The Aquatic Gazette

Archive for May, 2011|Monthly archive page

Takashi Amano | Nature Aquarium Aquascapes

In Pictorial on May 31, 2011 at 00:01

As a pictorial follow up to our recent aquascape edition on the Nature Aquarium style, we are glad to feature these pictures of Nature Aquarium Aquascapes from Takashi Amano’s photography portfolio.

Although these pictures are of some age now, they still never fail to impress. We believe that they will continue to be a source of inspiration and origin for all Nature Aquarium aquascapers.

[TAG]

credit: Takashi Amano | http://www.amanotakashi.net/

Aquascape | Nature Aquarium Style

In Aquascape Series on May 30, 2011 at 00:01

Not a small number of us started this hobby after viewing a picture of a Takashi Amano aquascape on the internet. When Takashi Amano first introduced the Nature Aquarium style, it took the aquascaping community by storm, for aquascaping with nature as an inspiration was not new, but never at this level of skill and authenticity. One American publication went as far as to place a note beside the first published pictures of his aquascapes to inform readers that these were man made, and not pictures of nature.

The Japanese are master gardeners, practicing the art since the 6th century. From the late 12th century to the 19th century, Japanese gardens became a high art form, having been influenced by the Japanese Tea Ceremony and their Zen beliefs. By that time, Japanese gardens were known as places for contemplation, meditation, enjoying the wonders of nature and as a place for meaningful ceremonies. Seyemon Kusumoto wrote that the Japanese are best at ‘generating nature’s handiwork in a limited amount of space’. Japanese gardens became so beautiful that they were imported overseas, there are now 65 notable gardens found outside of Japan.

Japanese Garden | Erinji

Similar to the Japanese garden, the concept for the Nature Aquarium style is to replicate nature within a designated space, establishing an aquascape that learns from nature. The aquascaper studies how nature compose itself and incorporates that knowledge. Nature Aquarium aquascapers often browse landscape, aquatic nature or biptope pictures for inspiration before composing their layouts. This mimicking of nature has been termed by ADA as “Natural Expression”. In ADA’s literature, natural expression can be achieved by; the attaching of flora to driftwood and rocks, mixed planting of flora, the creation of shadowy areas, different coloration of flora, different flora layers and the use of stem plants to express an aquascape that is subjected to bright sunlight.

As the Nature Aquarium style is a natural expression of nature, and nature by itself is diverse and varied, many different variations of the Nature Aquarium style exist. These variations can be categorised into two sub-styles, the driftwood style and the iwagumi style.

The driftwood style is a style that imitates the freshwater aquatic environment. In these environments, there is an abundance of driftwood which provides refuge and food for aquatic fauna. In an Nature Aquarium aquascape, the use of driftwood and rocks are termed as ‘hardscape’, this hardscape forms the foundation of the aquascape and should always be established before any flora is planted in the substrate. The Nature Aquarium style also introduced the use of flora that grows on hardscape, such as aquatic moss and flora with rhizomes.

In the driftwood aquascape, stem plants are often used as a background, or to partially cover parts of the driftwood as this helps to create a more natural feel to the placement of driftwood within the aquascape. It is also not uncommon that in a driftwood aquascape of some age, only a small part of the driftwood can be seen. However, it is still true that the entire aquascape is formed with the driftwood as a foundation and that is always apparent.

One unique aspect of the driftwood style not found in any other aquascaping style is the possibility of establishing an aquascape without the use of flora, and such an aquascape will only consist of hardscape. Although it is not everyone’s cup of tea, an aquascape with only hardscape conveys a sense of strength and flow through the branches of driftwood. Rocks are usually added to hide the bottom ends of the driftwood and to balance out the transition from substrate to driftwood. A hardscape-only aquascape will not only appeal to those that do not want to have any flora in their aquascapes, but still would like a replication of nature as compared to a bare tank. Discus biotopes are often hardscape centric.

The iwagumi or ‘stone formation’ style was developed some 30 years ago. When Takashi Amano was in his early 20s, he became interested in creating an aquatic layout using rocks and studied Suiseki, the Japanese art of stone appreciation and Bonseki, the art of creating miniature landscapes on a black lacquer tray. These studies and his own experiments aided him in establishing the iwagumi style.

The first rock to be placed in an Iwagumi is the primary rock or largest rock, the Oyaishi, and it is always placed off center, in accordance to the one third rule. It is also often slightly tilted in the direction of the water flow, to give it more of a natural feel as any tall flora will also move in the same direction. After the Oyaishi, the second largest rock is placed, the Fukuishi. The Fukuishi is placed on either the left or right side of the Oyaishi, its role is to balance out the Oyaishi and to create a tension that is seen in all Iwagumi aquascapes. The third largest rock follows the Fukuishi, the Soeishi. It is placed in a position that accentuates the strength of the Oyaishi. The fourth largest rock is the Suteishi, and it is placed in areas which compliments the entire rock formation and assists in bringing all the different rocks together. The Suteishi are not meant to stand out from the rock formation and they are sometimes hidden by flora, because of these factors, it is also known as the sacrificial stone.

Except for the Oyaishi, there can be many Fukuishi, Soeishi and Suteishi, with the numbers of the particular type increasing as the rocks get smaller. The naming of the rocks based on their sizes provides a guideline to the Nature Aquarium aquascaper on how to produce an Iwagumi aquascape that balances itself.

The most basic of all iwagumi is the Sanzon Iwagumi, or ‘three-pillared rock formation’. As suggested by its name, only three rocks are used, the Oyaishi, the Fukuishi and the Soeishi. The Sanzon Iwagumi is popular among nano aquascapers because it does not take up much space. Simple and non-complicated, some of the best iwagumi aquascapes are of the Sanzon Iwagumi style.

In an iwagumi aquascape, the types of flora used in each aquarscape is limited to a small number. Low lying carpet flora such as Hemianthus callitrichoides or Glossostigma are extensively used, while delicate flora such as Hairgrass or Vivipara are used selectively to bring into highlight certain parts of the rock formation or to cushion the impact of the rock formation in a small aquarium. The aim of using these flora is to create the impression of a well balanced rock formation that stands on a beautiful field.

ADA was the first to introduce Glossostigma to the aquascaping community, before its introduction, such a low lying carpet flora did not exist in the hobby. After its introduction and with the large amount of flora that is usually found in a Nature Aquarium aquascape, it become essential that a more suitable substrate be used, rather than sand or gravel. To meet this need, ADA came up with Aqua Soil, a soil based, nutrient rich substrate that continues to be the standard for aquarium substrate.

ADA also revolutionise aquascaping with the introduction of the first dedicated CO2 regulator. The ability to specifically control the amount of CO2 in an aquascape allowed aquascapers to use flora that were previously not possible. The introduction of pressurised CO2 also created the famous ‘bubbling’ effect through the photosynthesis of flora, producing oxygen bubbles. This effect enhanced the beauty of the aquascape and many of us will remember our first encounter with a ‘bubbling’ aquasacape as one of wonderment.

With the Dutch style, filtration pipes, CO2 diffusers and lighting units are hidden by a background, ensuring that the viewing of the aquascape is without distractions. As the Nature Aquarium style does not utilise a background, ADA invented glass filtration pipes and glass CO2 ceramic diffusers, while also making popular the rimless glass aquarium and lighting pendant. ADA created a whole range of products to support the Nature Aquarium style, marketing them as essential to the style. Few can argue that a complete ADA set up, with a Nature Aquarium aquascape, is one of the most beautiful example of an aquarium today. ADA has established beautiful, yet functional equipment as a staple to the aquascaping hobby, and because of the popularity of these products, numerous aquatic companies today, produce their products at this minimum standard.

As with the Japanese garden, the Nature Aquarium style has found widespread acceptance due to the appeal of having a piece of nature right at home. Besides this appeal, the worldwide growth of the style can be attributed to the efforts of ADA, a central entity that champions its cause, through the use of publication, products, branding, and excellent pictures. In contrast, the Dutch style is on a decline because of the lack of such a central force. ADA is Nature Aquarium’s critical success factor, it is the reason why the style dominates the aquascaping scene today.

ADA also plays host to the annual International Aquatic Plant Layout Competition, which drew 1,819 contestants worldwide in 2010. This competition has done much to raise standards in the Nature Aquarium style as contestants work annually towards a higher ranking. It is also through the recognition and prize money given to the top winners, that have established experts in this style besides Takashi Amano. These experts constantly push the boundaries and the Nature Aquarium style keeps getting better.

The years ahead look most favourable for the Nature Aquarium style, and it is very well possible that Takashi Amano has established a legacy in aquascaping, that none may ever match up to.

To view all the editions of our aquascaping series, click on this link: http://theaquaticgazette.com/aquascape/

[TAG]

credit: Aqua Design Amano | aquajournal.net

Takashi Amano | Amazon River

In Pictorial on May 29, 2011 at 00:01

Many an aquascaper has searched for underwater pictures of the Amazon River. We look to such pictures for inspiration and ideas when planning our aquascapes, even more so if we wish to attempt a biotope. Part of Takashi Amano’s photography portfolio are these fantastic underwater pictures of the Amazon River. Viewing these pictures is humbling and reminds us that we can always try to copy nature, but we can never replicate the full beauty of it.

Let’s also hope that the local governments who have custody over the Amazon River will commit more resources into its preservation, ensuring that its beauty continues to be shared for all future generations.

[TAG]

credit: Takashi Amano | http://www.amanotakashi.net/

Aquascape | Dutch Style

In Aquascape Series on May 28, 2011 at 00:01

In our introduction, we explored the Dutch style briefly and touched on the reasons it did not really take off outside the Netherlands and in its neighbouring countries. In this edition, we will go deeper into the details in the Dutch style and why it is considered the most difficult of all aquascaping styles.

NBAT Dutch Aquascape

In the Netherlands, the Dutch style is embraced with a local passion unseen in any other styles of aquascaping. To understand why true Dutch aquascaping is so difficult, we look at the official guidelines that have been established for decades.

The national society responsible for this is the National Bond Aqua-Terra, (NBAT) founded in 1930. It consists of about 120 clubs at the local level that are then divided into 15 districts. Annually, the NBAT organise a “Huiskeuring” in which all contestants compete for the much coveted title of Grand Champion. The competition is contested in three stages, with the winners going on to the next. The first is at the local club level, the second is at the district level and the third is at the national level. Judges from the NBAT will grade the aquascapes based on the following criteria.

1. Combination of animals
2. Health of animals
3. Development of animals
4. The amount of animals
5. Choosen plants
6. Health of plants
7. Development of plants
8. Water parameters
9. General impression
10. Chosen animals
11. Decorative materials (including backwalls, gravel, etc)
12. Composition
13. Technical equipment
14. Safety
15. Maintenance

Because of the extensive grading process, judging by pictures is not possible and all aquascapes are judged in person by a NBAT judge. Judging the “Huiskeuring” is an established and serious process, these judges are certified through an exam and three years of training.

Because of these strict established guidelines, aquascaping in the Dutch style is difficult compared to the other styles. It is common to see Dutch aquascapes outside of the Netherlands that consists of elements that will never be found or practised. Some of these include the use of wood and rocks (although wood covered with moss is becoming acceptable), the use of too many red coloured flora, the use of low foreground plants (introduced by the Nature Aquarium style) and the use of fauna that do not complement the aquascape.

NBAT 2009 Grand Champion | Raymond Duindam

The Dutch style can be best described as an aquatic garden. Flora is arranged in groups, with care taken to ensure that the different flora types compliment each other, each group of flora is not allowed to be repeated in other areas of the aquascape. Throughout the aquascape, the height of individual flora are trimmed to the exact desired heights, this is highly important as the Dutch aquascaper needs to create an effective depth of field which is critical to the success of the aquascape. Shorter foreground plants are usually angled to create that impression as well. But other than the depth of field, the real beauty of the Dutch style lies in the different colours, shapes and contrast between each group of flora, yet coming all together in harmony. And to achieve this harmony, the rule of two thirds is always used as a foundation of the aquascape.

Substrate is always to be of a light and plain colour, and as such, sand or gravel is often used. Because sand or gravel substrate is inert, most Dutch aquascapers will use substrate fertilisers to ensure their nutrient-hungry stem plants are well fed, liquid or dry fertilisers are also often used as additional supplements. One of the most interesting NBAT guidelines states that the use of non-rounded gravel with Corydoras will result in the deduction of points. It is heartening to know that in a planted competition, such care is still required of our fauna, as should always be the case.

A major emphasis of a Dutch aquascape is the health and arrangement of the flora. Less is sometimes more, and this holds true for Dutch aquascapers. In all the styles of aquascaping, we feel that aquascapers of the Dutch style often have the healthiest, most well-pruned flora. As they have no hardscape to hold their aquascape together, Dutch aquascapers have honed their skill on the care of flora to a remarkable level.

When comparing different Dutch aquascapes around the world, it is quite apparent that the NBAT aquascapes are executed with more sophistication and flair. Instead of depending on strong focal points such as numerous red plants, wood or rocks, they prefer to let the aquascape speak in its entirety. When viewing a well executed Dutch aquascape, it is like appreciating a balanced fine wine, with the last few glasses often being the best.

NBAT Dutch Aquascape
Non-NBAT Dutch Aquascape

The Dutch aquascape is housed in a tank enclosed on all sides, except from the front, by a wooden cabinet. The back and sides of the tank are also covered by a thin background, which enables the aquascaper to attach moss or other kinds of similar flora. Lighting used to be exclusively T8 but some now use T5HO (high ouput) as the introduction of new stem plants require higher lighting levels than what T8 is capable of. Pressurised CO2 went through the same path. Many had resistance towards the usage but as the new stem plants needed pressurised CO2, the practice was slowly accepted. All equipments are hidden in the wooden cabinet, in stark contrast to the Nature Aquarium style in which aquascaping equipment is part of the beauty of the total aquascape.

Although a masterfully done Dutch aquascape is something to behold, the future for this style of aquascaping is not looking that bright. The majority of the NBAT contestants are now over the age of 50. Concerns from established NBAT contestants has been that the younger generation lack the patience to hone their aquascaping skill to the established high standards, a process that make take years. At its peak, NBAT membership stood at 24,000, but by the year 2009, numbers have dropped to 4,000.

We hope that through the use of new media and the internet, Dutch aquascapers can reach out and show us that the Dutch style is one of great finesse, sophistication and skill, bonded by a community passionate about a style that is full of tradition and history. And with that, maybe the numbers of Dutch aquascapers will increase and we may well see organisations, similar to the NBAT, in our neighbourhoods.

Thank you for reading and we end this edition with a film of a Dutch aquascape.

To view all the editions of our aquascaping series, click on this link: http://theaquaticgazette.com/aquascape/

[TAG]

credit: Marco Aukes | Robert Paul Hudson | alderliesten1967 | Raymond Duindam

ADG The Amazon Biotope | Trailer

In Film on May 27, 2011 at 00:01

Aquarium Design Group: This is a preview for the upcoming feature-length presentation of our newest installation into the forthcoming ADG Gallery inside our new retail concept store. The Amazon Biotope Aquarium: Inspired by our studies of Heiko Bleher’s now famous books and texts documenting his decades of exploration and discovery in the Amazon, we sought here to meld our passion for hardscape-design with a truer sense of the natural environments of some of the Amazon’s most legendary aquarium species.

I don’t know about you, but this trailer stirs up deep emotions for us. ADG managed to capture the serenity and majesty of discus swimming in biotope aquarium. We will bring you the complete film once ADG releases it. Thank you for viewing.

[TAG]

credit: ADGVibe | http://www.youtube.com/user/ADGVibe

Aquascape | An Introduction

In Aquascape Series on May 26, 2011 at 00:01

Welcome to our Aquascape Series. In this first edition, we will introduce the concept of an aquascape, a short history of aquascaping, the different kinds of aquascapes and the future of aquascaping.

Aqua – water
Scape – a combining form extracted from landscape, denoting “an extensive view, scenery,” or “a picture or representation” of such a view, as specified by the initial element: cityscape; moonscape; seascape.

Loosely defined, an aquascape is the replicating of nature, or the creation of one, within your aquarium.

It is interesting to note that aquascapes have been around for as long as aquariums have. In the mid 1800s, balanced aquariums that featured both fauna and flora were common. Unlike today’s modern aquariums in which flora is introduced because of choice or preference, in the mid 1800s to the very early 1900s, flora was essential to the health of the aquarium. In an era in which the powered aquarium filter did not exist, large amounts of flora coupled with frequent water changes in a sparsely populated aquarium, ensured sufficient water quality for these early pioneers. Flora also played the vital role of oxygen creation in these early aquariums as a water-powered aquarium air pump only came into being around 1908.

1850s Aquarium | Vallisneria spiralis & coldwater fish

Aquascaping as we know it today, is more concerned with the creation of an aquatic biotope or aquatic garden for viewing pleasure, rather than the need for flora to sustain the lives of our fauna. Modern aquascaping started with the Dutch style, around the 1930s. The Dutch style is to emulate a garden inside an aquarium by planting different flora in neat rows, allowing the different aspects of the different flora to compliment the other, similar to landscape gardening. At that time, commercial aquarium equipment were just becoming available, aided in no small measure by the widespread growth in the use of electricity after World War One. The Dutch style took root in Europe and became popular, especially among aquascaping clubs dedicated to the style. It is however not as popular in other parts of the world because information on this style, especially pictorial information, was not as readily available then, as it is today. Also to undertake a Dutch aquascape, is a pretty serious affair with the flora clearly being the highlight of the aquarium and this prevented casual aquascapers from trying it out. It was not until the arrival of the Nature Aquarium style, did aquascapes became commonplace among all aquatists as the Nature Aquarium style afforded casual aquascapers a great measure of flexibility. Even if an aquascaper wants an aquascape without any flora, it’s possible with the Nature Aquarium style.

Dutch

In the last decade of the 20th century to our present day, the Nature Aquarium style, developed by Takashi Amano has largely influenced every aspect of aquascaping. The major difference between the Dutch style and the Nature Aquarium style is the desire to replicate aquatic nature. The Nature Aquarium style popularise the use of wood, stones, plants with rhizome, low lying plants and aquatic mosses in aquascapes. With the desire to spread the use of this new style, Takashi Amano founded Aqua Design Amano, and through dedicated products and beautiful pictures of his aquascapes, aquascaping in the Nature Aquarium style grew tremendously. In the last 15 years or so, Aqua Design Amano products have led to the creation of numerous aquatic companies producing cheaper versions of their products such as glass lily pipes, CO2 drop checkers, pressured CO2 system and layout tools, giving aquascapers a large range in choice. Today’s aquascaping normals such as rimless glass tanks, gaseous CO2 delivery and higher levels of aquarium lighting are also a result of their influence.

Within the Nature Aquarium style, there are two sub-styles. The first being the driftwood style, and the second being the iwagumi style. Both these sub-styles will be covered at length in the next few editions.

Nature Aquarium | Driftwood 
Nature Aquarium | Iwagumi

Since the introduction of the Dutch and Nature Aquarium style, no other style has been able to emerge successfully as a third major alternative as these two styles seem to have fully covered every other variation in aquascaping. Some have tried to introduce new aquascaping styles such as an Urban style, but these styles have been firmly rejected by the community due to their strong detachments from the origin of all flora, nature. However, in very recent times, one style is starting to show great promise, being embraced in increasing numbers, and that is the Riparium style. The beauty of the Riparium style lies in growing flora both below and above the water level, as compared to all other aquascapes that concentrates on growing flora below water level. Devin Biggs, the creator of the Riparium style founded his own company, Riparium Supply and they have launched a variety of products dedicated to this style of aquascaping. We see a very similar pattern in history between Aqua Design Amano and Riparium Supply. Both styles of aquascapes were created by their founders and both are also the first to retail products for their style of aquascaping. We do hope that with such a concerted effort by Riparium Supply, the Riparium style will blossom into the third major alternative.

Riparium

The popularity of aquascapes among aquatists, and the dominance of the Nature Aquarium style can be contributed to the internet. In the days of the Dutch style, sharing of ideas and pictures of aquascapes could only be done through local clubs and printed pictures. With such a tradition and history, the Dutch style is still largely kept to such a heritage while the internet and new media is swamped with the Nature Aquarium style. Further prove of this comes from the fact that the Nature Aquarium style is the heavily preferred style in newly developed countries (countries that have become developed in the last 20 years or so) because of their new wealth and access to the internet. The Dutch style is not practised in significant numbers among the aquascapers of such countries because of the continual tradition of its enthusiasts in keeping to the local clubs and communities. Thus, few examples of the Dutch style are found on the internet.

Popular aquascape centric forums such as The Planted Tank and Aquascaping World, have provided a rich sharing platform for the exchanging of information. Excellent guided set ups, equipment reviews, comprehensive guides and the engagement between aquascapers are just some of the information available today. The increasing use of an ASP-C sensor camera or a full frame sensor camera, has also led to an explosion of aquascapes in great pictorial detail. These aquascapes do much to inspire the community and newcomers to the hobby are always almost drawn in by these pictures. The organisation of annual aquascaping contests which happens world wide, has also bred professional aquascapers who constantly push the boundaries in aquascaping design. Some of these professionals have even established retail stores and provide a measure of inspiration and guidance to their local aquascaping communities.

International Aquatic Plants Layout Contest | Chow Wai Sun
International Aquatic Plants Layout Contest |  Li Da Wei
International Aquatic Plants Layout Contest | Yutaka Kanno

There are a lot more companies today, that spend research money innovating new products for the aquascaping community as compared to the past. These companies are interested in establishing a name for themselves, they are no longer satisfied in copying and then undercutting the bigger brands’ products. Good examples are CAL Aqua Labs’ inline diffuser range and Ecoxotic’s LED arm which bring new options to the table. As the aquascaping community grows, more aquatic companies will develop products specially for the market, and because of these new products, the community will have every reason to grow further. The next few years will be exciting times for all aquascapers.

To view all the editions of our aquascaping series, click on this link: http://theaquaticgazette.com/aquascape/

[TAG]

credit: Aqua Design Amano | http://aquajournal.net/| Riparium Supply | http://ripariumsupply.com/ | Shay Fertig | Yutaka Kanno | Li Da Wei | Chow Wai Sun

jcardona1′s Wild Discus Biotope | Pictorial Update (1)

In Pictorial on May 26, 2011 at 00:01

jcardona1’s Wild Discus Biotope has been covered in an extensive 5 edition series. As he continues to update us with pictures of his biotope, we are delighted to bring you this first pictorial update. If you have missed out on his build editions, you can check them out on our build page using this link: http://theaquaticgazette.com/build/

Enjoy!

[TAG]

credit: jcardona1

Caridina cf. cantonensis ( Bee Shrimp ) Habitat

In Film on May 24, 2011 at 00:01

The keeping of Bee Shrimps have taken off quite spectacularly in the last 5 years. New colourations and grades are almost annual occurrences as breeders continue to work hard at selective breeding. Some fauna have gone through this process, with the Betta Splendens coming to mind, having been remarkably improved in form, shape and size through selective breeding. But unlike the breeders of the Betta Splendens, shrimp breeders have that much more incentive to breed the next ‘big thing’ because of the high premium in shrimp prices.

For a fauna that is known more for its existence in the tanks of breeders world wide than in the wild, Chris Lukhaup finds the habitat of the Bee Shrimp on an exploration trip sponsored by Dennerle and shares this film on YouTube. In the near future, we will be embarking on a shrimp series in which the different types of shrimp will be introduced.

Enjoy this film!

[TAG]

credit: Chris Lukhaup

jnaz’s ADA Room

In Build on May 20, 2011 at 00:01

Quite a few of us contemplate about having an ADA tank or maybe a second one, jnaz’s ADA Room houses not 1 or 2 but 8 ADA tanks! His 8 ADA tanks are housed in a 10 x 12.5 metre room with light grey wall colour and a bamboo laminated flooring. Some of the tanks are still works in progress and we will publish an update when it becomes available.

Here are the technical equipment specifications and pictures of his ADA room.

Tank: ADA 120H
Tank Stand: ADA look-alike cabinet
Lighting Unit: TEK light
Filter: Eheim 2217|fishman’s Lily Pipes
CO2: Gaseous CO2 system

Tank: ADA 120P
Tank Stand: ADA look-alike cabinet
Lighting Unit: Tek light
Filter: Eheim 2217|fishman’s Lily Pipes
CO2: Gaseous CO2 system
Cooling: Chiller (for SSS CRS)

Tank: ADA 90H
Tank Stand: ADA look-alike cabinet
Lighting Unit: Tek light
Filter: Eheim 2217|fishman’s Lily Pipes
CO2: Gaseous CO2 system

Tank: ADA 90P
Tank Stand: ADA look-alike cabinet
Lighting Unit: Tek light
Filter: Fluval 405|fishman’s Lily Pipes
CO2: Gaseous CO2 system

Tank: ADA 60P
Tank Stand: ADA look-alike cabinet
Lighting Unit: Solar II with Solar Arm
Filter: Eheim 2213|ADA Lily Pipes
CO2: Gaseous CO2 system

Tank: ADA 60F
Tank Stand: ADA look-alike cabinet
Lighting Unit: Clip on light
Filter: Small Hang on Filter

Tank: ADA Mini M
Tank Stand: Grey Metal Rack
Lighting Unit: Solar Mini M
Filter: Eheim 2213 | ADA Lily Pipes
CO2: Gaseous CO2 system

Tank: ADA Mini L
Tank Stand: Grey Metal Rack
Lighting Unit: Solar Mini M with Modified Base
Filter: Eheim 2213 | ADA Lily Pipes
CO2: Gaseous CO2 system

ADA 90P
ADA 90P
ADA Mini M
ADA 60F
ADA 60F
ADA 90P (after a rescape)
ADA 60P
ADA 120H
ADA 90H | ADA 120H

Thank you for viewing. If you would like to join in the forum discussion on jnaz’s ADA Room, please click on this link: http://www.plantedtank.net/forums/tank-journals-photo-album/109433-ada-room-added-few-pictures-page.html

[TAG]

credit: jnaz

ADG 60cm Hardscape

In Film on May 19, 2011 at 00:01

With aquascaping on the increase in recent years, few aquarists these days will actually prefer an empty tank for their fauna. The only justification is that your fauna is best housed in an empty tank, for optimal health and presentation. Even for sensitive faunas such as Arowanas, Bettas and Discus which always have been traditionally housed in an empty tank, advances in aquascaping techniques and knowledge has led to workable aquascapes that have been design around their needs. jcardona1’s Wild Discus Biotope is a good example. (http://theaquaticgazette.com/2011/04/28/jcardona1s-wild-discus-biotope-1/)

However, some newcomers to aquascaping do not want the added task of caring for flora, yet they still want a good looking aquascape. The lack of flora takes away the need to ensure proper lighting, CO2 requirements and nutrients dosing. The reasons for wanting this lack are many; a limited budget, no interest in flora, a preference for a hardscape centric aquascape, limited maintenance time, are just some of the reasons.

Whatever your reason might be, Aquarium Design Group shows us how an aquascape without flora can still look good. We hope that this film will inspire those that are on the fence, to try aquascaping their aquarium. You will be rewarded with a beautiful aquarium and your fauna will love you for it. Enjoy the film!

(If you would like to watch the video in a bigger size, please view this article in a single page format by clicking the title)

[TAG]

credit: Aquarium Design Group | ADGVibe

jcardona1′s Wild Discus Biotope (5)

In Build on May 18, 2011 at 00:01

Welcome to the final edition of jcardona1′s Wild Discus Biotope, those who have read the previous 4 editions will agree with us that it has been a most enjoyable ride. If you have missed out on Edition 4, it can be found here: http://theaquaticgazette.com/2011/05/15/jcardona1%E2%80%B2s-wild-discus-biotope-4/ Enjoy the pictures!

jcardona1: I took the time to get some nice photos of the tank! You’ll notice that I added 3 angels and a group of Lemon Tetras to the tank. The angels are the poor-man’s version of the majestic Altum angels, well, maybe one day. A few discus are missing from the 190g since they didn’t seem too happy. I think some internal bugs may have returned, so they’re currently being treated in separate tank. All part of the game.

And some new photos of the Alenquers in their QT tank. These guys are really looking amazing. They rarely show their mood/stress bars, meaning they must really be happy.

We would like to express our heartfelt thanks to jcardona1. His Wild Discus Biotope has been a work of art and an inspiration. We look forward to bringing you more editions of his future builds. Thank you for reading!

26th May 2011 | Pictorial Update 1 http://theaquaticgazette.com/2011/05/26/jcardona1%E2%80%B2s-wild-discus-biotope-pictorial-update-1/

[TAG]

credit: jcardona1

Fat Guy’s ADA Mini M (2)

In Build on May 17, 2011 at 00:01

Welcome to Edition 2! If you have missed out on Edition 1, it can be found here:http://theaquaticgazette.com/2011/05/14/fat-guys-ada-mini-m-1/ Enjoy this edition!

(33 days later, from establishment)

Fat Guy: I had called around to different stores trying to find Ember Tetras, as I really liked the way that they look. But my hunt came up empty as not one store in my vicinity had them in stock. Regardless, I was determined to pick up some fish today for my Mini M. I had been considering Celestial Pearl Danios and found some at Pacific. (a local fish shop) I was a couple of heartbeats away from purchasing them but as I took a couple of careful walks around the tanks and observed the tetras and rasboras et al, I watched how they behaved and tried to imagine them in my tank and the aquascape that I have created. It was at this moment, that I came across a tank labeled “Chilli Rasboras ‘rare’.

This tank was full of lovely Boraras Brigittae that were going for US$6.98 for 3. Regardless of the price, I really enjoyed watching the shoal and the handful that were, really pushing into the current in the tank. So I paid for 12 of them and got one free by accident, but this balances the purchase because I later noticed that one of them was missing an eyeball. I also noticed two spots of ich on one of them and so I am expecting an outbreak. I can only keep my finger crossed because I did not quarantine them.

After bringing them home and adding them to the Mini M, they were a lovely fit. They mesh extremely well with the scape I have created. I also pulled out a large female Cherry Shrimp from my Fulval Edge breeding tank and added her to the setup. The Cherry Shrimp are bigger than the Boraras Brigittae, which is awesome. The Otocinclus however, now looks out of place, but it is a wonderful inhabitant nonetheless.

I decreased the current in the tank to a nice gentle flow. Now I will have to see how the balance of co2 I have been maintaing is affected by the reduction of water flow. I am definitely still battling diatoms on the HC, as you can see in the pictures, but new growth is really pushing through and a lot of the roots are close to the powersand which makes me a happy planted aquarist.

The tank with two Cherry shrimps and an Otocinclus
The boraras brigittae getting acclimated in a deli cup.

Here they are in the tank. It’s nice to see the Otocinclus cleaning the diffuser in this shot, now I need to find a way to get him to clean the diatoms off of the lily pipes, the Otocinclus is such a great fish for a nano like this. When I first introduced him to the tank, I was moments away from accidentally gassing him with too much co2, I’m very glad I did not.

(74 days later, from establishment)

I’ve been aggressively cutting the HC and it has really paid off, although it has been very time consuming. My nano diffuser broke today when I was adjusting its position so I had to purchase another, here in New York City. I think the quality of glass and pressure had a lot to do with the break, as the diffuser seemed to burst from the bottom curve after I bumped it on the glass. The only downside with the diffuser I purchased today is that it is not as small as my previous one. Unfortunately I lost all my Boraras Brigittae from a severe ich outbreak, but I picked up 6 Emerald Eye Rasboras from New World Aquarium on 38th street. I’m very happy with these fish, and they are also super healthy. I also snagged an amano shrimp for some maintenance and it is a monster. To clean the rocks, I’ve been using an old head from an Oral B Sonicare brush that I hook up to the sonicare base.

To clean my lily pipes, I made a simple bleach solution with 1 part bleach to 4 parts water and used some ornament wire that I twisted together to scrape the tubes with. I also used a little piece of paper towel to push through the pipes. All in all, it was not as painstaking as I thought it would be, but definitely a delicate task. Fortunately nothing broke and the pipes look super clean.

The filter was treated to a backwashing and I swapped out some filter floss. I noticed that the Eheim 2211 runs super quiet when clean but makes a little more noise when dirty. Below is the tank with the clean pipes. I also threw in a picture of one of my female cherry shrimps for good measure. She’s is super red and has already produced some offspring that are hiding in the HC.

I’ve been removing with a toothbrush a little bit of filamentous hair algae. It hasn’t been a problem, just appearing in certain spots. But I’ve stayed the course and haven’t had any significant outbreaks. For the future, I’m looking to get a shorter pair of curved scissors to cut the HC on the right side of the rock as it is really hard to trim in that area with the 10″ curved scissors that I currently have.

This is the last edition of Fat Guy’s Mini M. We would like to thank him for sharing his experiences us, showcasing that less is indeed more in a good looking nano aquarium. We look forward to featuring more of his work in the future. If you would like to read his build in its entirety and follow his progress, his thread can be found here:

http://plantedtank.net/forums/planted-nano-tanks/124973-fat-guys-ada-mini-m-fall.html

[TAG]

credit: Fat Guy

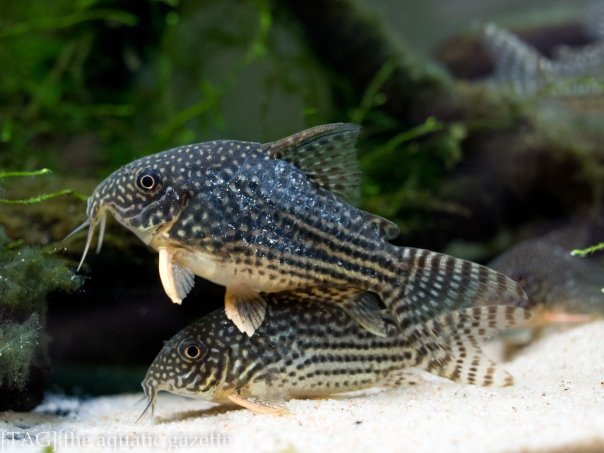
Corydoras sterbai

In Fauna on May 16, 2011 at 00:01

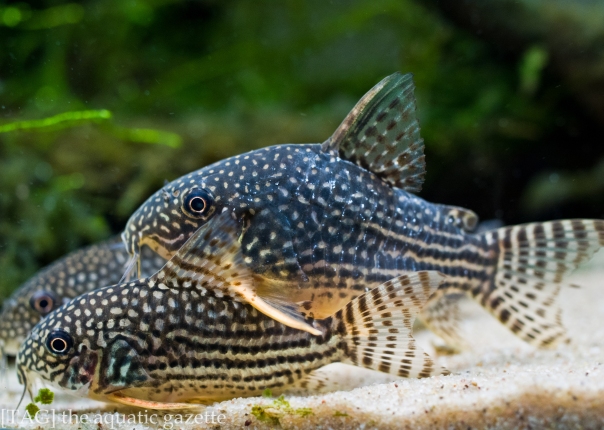
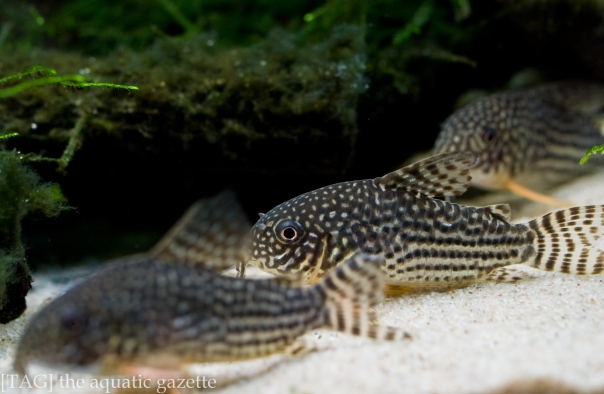
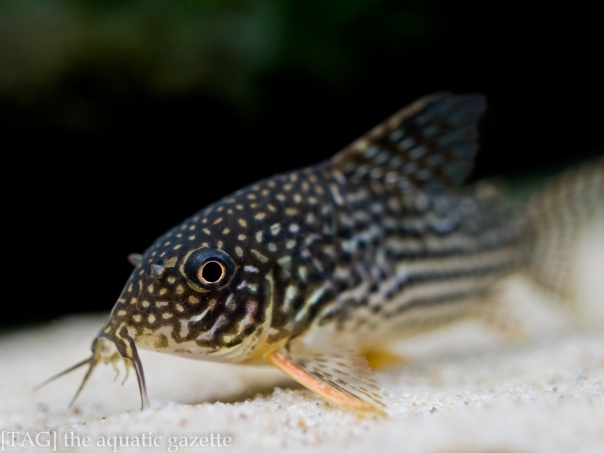
The Corydoras sterbai is a popular catfish to keep, it is regularly recommended to new keepers because of its hardy properties, attractive markings, shoaling behaviour and small size. It was named after, and in honour of Dr Günther Sterba.

In the Wild
Wild C. sterbai originates from slow South American waters that are low in pH and oxygen. These waters are swallow and clear, which enables the C. sterbai to make quick dashes to the surface for air. Just like the Betta and Gourami, their ability to take air directly from the atmosphere helps them survive in areas where other fauna will perish from oxygen deficiency. Being bottom dwellers, they forage for food using their sensitive barbels for insects, fish parts and plant matter that have sunk to the bottom. In the wild, they are easily found in shoals of hundreds and sometimes in the thousands.

In the Aqauarium
Almost all of the C. sterbai found in our local fish shops today, are tank bred and this is a good thing. Tank bred C. sterbai are hardier than their wild counterparts as they have been brought up in an environment that is very similar to our aquariums. This similarity is what enables them to adapt readily to any well-maintained aquarium.

The C. sterbai thrive in a pH range of about 6.0 to 7.5 and the aquarium’s temperature should be kept between 24 to 28 degree Celsius. If possible, driftwood should be introduced to simulate their natural environment. They should be fed a sinking food type of good quality as their staple diet, Hikari’s Sinking Wafers are recommend. (http://theaquaticgazette.com/2011/04/29/hikari-sinking-wafers/)

As there are a very peaceful fauna that only grows to a maximum of 6.5cm, aggressive and larger tank mates should be avoided. In the wild, they shoal in large numbers and because of this genetic imprint, C. sterbai should not be kept in groups of less than 5 members. As it is with other shoaling fauna, the larger the group, the more stable the members are.

One common question we get from new Corydoras owners is what substrate should be used and what size should it be? Here at [TAG], we would recommend sand because of the following reasons.

1. Substrate cleanliness is a priority. Poor substrate health usually leads to the degradation or infection of the C. sterbai’s barbels. C. sterbai that have lost their use of their barbels will have difficulty hunting for food, with some infection cases leading to a growth over the mouth, completely blocking any access to food. Because sand is one of the most compact of substrates, this prevents uneaten food or dirt from slipping deep into the substrate, ensuring good substrate health. When using gravel which has a bigger grain size, regular maintenance is necessary to ensure dirt does not build up between the cracks.

2. When C. sterbai forages for food in a sand based substrate, they suck sand through their mouths and blow it out through their gills, filtering any food that is found. Through this act, it shows that the substrate in nature is small enough to allow this.

3. There has been some speculation that gravel can hurt the C. sterbai’s barbels if they have sharp edges. Although this is unproven at the moment, it is just another reason to use sand if you would not like to take the risk.

All three reasons are strong incentives to use sand. However sand is light and does move around quite a fair bit, and it can be a disaster if sucked into a filter as a filter’s impeller is sensitive. Any slight damage to the impeller may result in a noisy filter or reduced performance. As such, we would recommend the use of quality sand, such as ADA’s Rio Negro sand. Quality sand are usually softer and compact better, and even if sucked into a filter, they are soft enough to not do any damage. We would be doing a review on ADA’s Rio Negro sand in the near future.

Although the C. sterbai originates from slow moving waters that are low in oxygen, we would not encourage a replication of such an environment in your aquarium. As with any aquatic fauna, they will benefit from a moderate flow and good oxygen levels. A moderate flow (except for fauna that require a high flow) will keep dirt from accumulating, improve your fauna’s appetite and ensure a good gaseous exchange. As long as your C. sterbai can rest on the substrate or swim without getting blown around, your flow is fine. In our 15 litres C. sterbai tank, we have a flow rate of about 300 litres per hour, a turn over rate of 20 times per hour.

With good flow and good water surface agitation, a healthy amount of oxygen will be present in your aquarium. As this level is more than what is available in the wild, your C. sterbai should not need to dart to the surface and take in air very often. If it happens once in a while, don’t be alarmed and take it to mean that your oxygen levels are low, it is a reflex that is part of their genetic imprint. But if it happens often, it is then likely that your aquarium suffers from low oxygen levels.

The C. sterbai is a good start to any new Corydoras keeper, and a fine addition to an established one. New keepers will be especially won over by their family behaviours and the bonds that they form within themselves. We hope that you enjoy keeping these heart warming fauna, as much as we have.

[TAG]

jcardona1′s Wild Discus Biotope (4)

In Build on May 15, 2011 at 00:01

Welcome to Edition 4! If you have missed out on Edition 3, it can be found here: http://theaquaticgazette.com/2011/05/10/jcardona1%E2%80%B2s-wild-discus-biotope-3/ Enjoy this edition!

jcardonal: I am very stoked! Just received my new group of wilds about an hour ago. I purchased three large Alenquer semi-royal Blues from John/Snookn. These guys are beautiful! John had them labeled as blues but he said lately they’ve been looking very red. Who knows, but they do look very nice. Here’s some pics in their QT tank which will be home for the next 4-6 weeks. I’ll be watching them closely to see if I need to give them a de-worming.

I got the RO/DI system hooked up. Thanks again to http://www.thefilterguys.biz. Second time I’ve ordered from them. Their products and service are top notch! I picked up the 5 stage Ocean Reef +1 unit, and hooked it up to the chloramine filter I bought from them some time ago. So I’m essentially running a 7 stage RO/DI unit

Hookup was a breeze. The unit started producing pure water in no time, with no leaks at all. Here’s a quick rundown of all that is going on for those that are new to RO/DI units (this is my first one as well).

*in order of water flow*
1. GAC Chloramine cartridge (granular activated carbon)
2. GAC Chloramine cartridge (granular activated carbon)
3. 5 micron poly sediment filter
4. 5 Micron Matrikx NSF rated CTO/2 Workhorse carbon block
5. 0.6 Micron Matrikx NSF rated chlorine guzzler carbon block
6. Dow Filmtec 75gpd RO membrane
7. DI cartridge w/ refillable resin

*misc*
8. Pressure gauge for water going into RO membrane
9. Inline dual TDS meter (measures straight tapwater and water before RO membrane)
10. Inline dual TDS meter (measures water after RO membrane, and after DI filter)

Waste water is going into my laundry drain. Maybe in the near future I can figure out a better use for it so I’m not wasting so much water.

And here’s some photos of the TDS meters in action:

Tapwater straight from the faucet
After passing through the RO membrane
And after the last stage, the DI filter. Purest water you can get. 0ppm TDS!!!

To re-mineralize the RO/DI water with essential minerals I’ll be using Kent’s R/O Right and Discus Essentials. I’ll add this after each water change, for the amount of water changed.

I have also ordered a TDS meter so that I can keep track of my parameters now that I’m using RO/DI water. I ended up ordering the Hanna Primo meter on eBay for less than $20 shipped. Very neat little unit, works like a charm. I tested the GH and TDS as follows:

Tapwater
TDS: 109ppm
GH: 80ppm, 4.48 dH

RO waste water
TDS: 132ppm
GH: 100ppm, 5.6 dH

RO/DI pure water
TDS: 1ppm (taken from water in barrel)
GH: < 20ppm, 1.12 dH (1 drop to change color)

190g tank
TDS: 313ppm
GH: 100ppm, 5.6 dH

30g quarantine tank w/ Alenquers
TDS: 87ppm
GH: 40ppm, 2.24 dH

In summary, I was surprised that RO waste water was actually higher in TDS and GH than tap water. I guess there’s a higher concentration of solids is in the waste water. Also of note, is that my 30g QT tank has the most ideal water. I’ve done 3-4 10g water changes on this tank using pure RO/DI water. This would be the ideal readings I’d like to have on the 190g. It will be a couple weeks before I can get this low on the 190g.

BUT, the 190g has come down in GH a lot!! Before I started using RO/DI water, my GH was at 220ppm / 12.3 dH. Huge difference! I wish I could have gotten an initial TDS reading before I started adding pure water.

It has been three days since the Alenquers were added to the quarantine tank and they were quite spunky this morning, so I snapped a few pics before work. I actually gave these guys a water change using RO/DI water, so the GH is even lower in this tank than my main tank.

And here is a small update on my LED light fixture. I was having a few issues with the first driver board and they weren’t dimming and turning off correctly. I think I may have fried the drivers when I first hooked them up to the power supply, since the voltage was turned up. Anyway, Aaron was kind enough to send me a new driver board. This one was even better than the first. The layout is identical, but this one is mounted to a nice little heatsink and fan to keep things cool.

While I was changing things out, I switched everything to a bigger project box because the PCB would not fit due to the heatsink/fan. So, I also decided to mount the project box underneath my stand; it was sitting on top of the light fixture before. This will make it easier to work on, and also easier to hook up to my laptop when I want to change the lighting program.

The only hard part was routing the wires back up to the light fixture. I only had to run the 4 negative wires from each driver, since this is what controls the PWM signal, and one positive wire to power all the strings. The LEDs are controlled independently by the CAT4101s, so there’s no issues with using one positive cable to power them all up.

Nothing beats sitting on the couch and watching the simulated sunrise and sunset from the LEDs

Edition 5 is a pictorial update of this amazing tank. To continue to it, click on this link: http://theaquaticgazette.com/2011/05/18/jcardona1%E2%80%B2s-wild-discus-biotope-5/

[TAG]

credit: jcardona1

Fat Guy’s ADA Mini M (1)

In Build on May 14, 2011 at 00:01

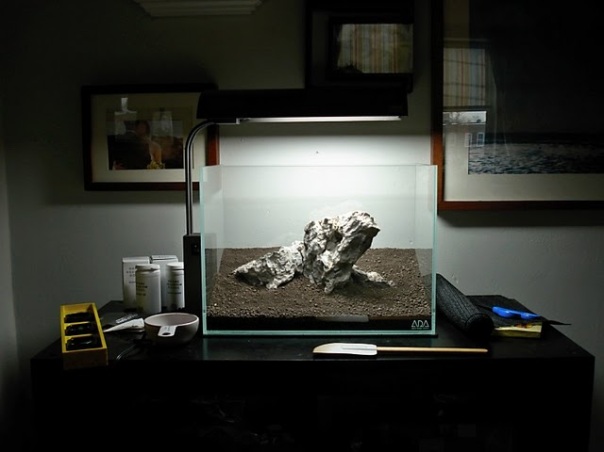
In nano aquascapes, less is always more, simplicity a virtue. We are always tempted to add all our favourite plants, rocks and wood  into our nano tanks, but it usually gives us an aquascape without a focus, without a purpose. Here, Fat Guy shows us how it is done.

Fat Guy: Here are my technical specifications.

Tank: ADA Mini M | DIY Garden Mat | Customised Glass Cover
Lighting Unit: Solar Mini M | 8/10 hours daily
Substrate: Power Sand S | Aquasoil Amazonia | Amazonia Powder | Clear Super | Bacter 100
Filter: Eheim 2211 | Cal Aqua 13mm Lily Pipes | Clear tubing
CO2: 2.3kg cylinder | 1 to 1.5 bps | Aqmagic Nano Diffuser | DIY Drop Checker
Hardscape: Ryuoh stone
Daily Fertiliser Regime: Flourish Potassium 1ml | Flourish Trace 0.5ml
Water Change Regime: 50% daily | 33% weekly after plants have established

I started with placing a layer of Bacter 100 and Clear Super before I added Power Sand. Then I used a good amount of Power Sand to aid in making the large slope at the back of the tank. I made sure to keep the Power Sand a couple of centimeters away from the front of the tank. Next, I added a little more Bacter 100 and Clear Super and on top of that, I added 3 litres of Aquasoil Amazonia, sloping it with a baking spatula. I then placed my rock setup which I had been contemplating for months (believe it or not), found a scape I enjoyed, aligning it to the golden ration of 1:1.618 and finished everything with a little Aquasoil Powder.

The tank is mainly HC. However, I found some really sexy glosso at Pacific Aquarium and decided to plant the glosso in the back left corner in the photo. I didn’t plant too much glosso, but I mixed in some HC with it as well. I think it may give the tank a nice contrast in depth and colour. I have been experiencing some water clouding the past couple of days. So I’ve been Just doing daily water changes and replanting the HC or Glosso that comes loose and floats to the top. I planted the HC in clumps of three or four, the planting was a little more difficult than I had predicted. It took a lot of patience, especially trying to maintain the slope while planting, misting and slowly filling with water. But once the water reached the tank’s brim and the substrate resettled from the vigorous planting, I was happy with the initial outcome. I honestly spent hours yesterday watching the water circulate and the plants pearl.

(10 days later, from establishment)

I will be waiting for a month before introducing any fish in this tank. I’ve also been turning the co2 off at night and raising the lily pipes. I noticed that the output flow of the lily pipe seemed a little weak so, I took the top off the filter and cleaned off the filter floss type stuff that came with it and hooked it back up. The flow increased dramatically. Amazing how dirty that section of the filter got. I’m thinking about getting a solenoid and hooking it up to a timer. I don’t mind adjusting things manually, but in the long run, it seems like just an all around smart purchase. Everything has been growing very well. Nitrites are high, as expected and I noticed some copepods on the glass today. This first week I am doing 50% water changes, after that, I will be doing water changes every other day. I’ve also been trimming the stems of glosso in the back that were starting to grow tall. It’s amazing how quickly that plant sends out runners. I’ll probably end up pulling it out and just making the tank HC, but for now, I enjoy monitoring its growth and trimming it short. The water in the tank is almost 100& clear now, after a couple days of aquasoil cloudiness. I really really enjoy this tank.

(16 days later, from establishment)

I did a little bit of a rescape today. The glosso and the HC were growing so well that I felt a little trepidation when I stirred up the aquasoil, but I wasn’t satisfied with my original rock arrangement so I made a sacrifice. A strand of glosso came loose during the rescape and the roots were over two inches long, that’s pretty wild! If any of you have followed my edge thread, you can see there how often I move things around. Although I felt trepidation at the start, I think I have made a step in the right direction. I added some more height and depth to the aquascape by manipulating the larger rock. I also added a little more Aquasoil Powder to connect the new arrangement and just a little bit of Clear Super. Got a little nervous moving the rocks after spending so much time before on the original arrangement, but I think that was my issue, I thought about it too much. So this time I just let it rip and didn’t spend more than 5 minutes on it, after this, I’m not gonna mess with the main rock arrangement anymore. I’m am going to let the plants grow and add the fish in a week or two, I think it’s going to look pretty cool once the white clouds move in. I may add some cherry shrimp just for good measure too.

Thank you for reading and if you would like to continue to the next Edition, click on this link: http://theaquaticgazette.com/2011/05/17/fat-guys-ada-mini-m-2-2/

[TAG]

credit: Fat Guy

ADG in Japan 2010 Nature Aquarium Party

In Film on May 12, 2011 at 00:01

Few of us have been to ADA’s Nature Aquarium Party or the Gallery at Niigata. In this film, Jeff Senske of Aquarium Design Group travels to Niigata Japan for the 2010 ADA Nature Aquarium Party and other events including a unique visit to Takashi Amano’s giant Nature Aquarium in his private residence, a solo visit to the Nature Aquarium Gallery, and a rock collecting trip in the Japanese countryside with Steven Chong. We have embedded this film from YouTube for your convenience. Please click on this article’s title to view the film in its proper size.

[TAG]

credit: Aquarium Design Group | ADGVibe

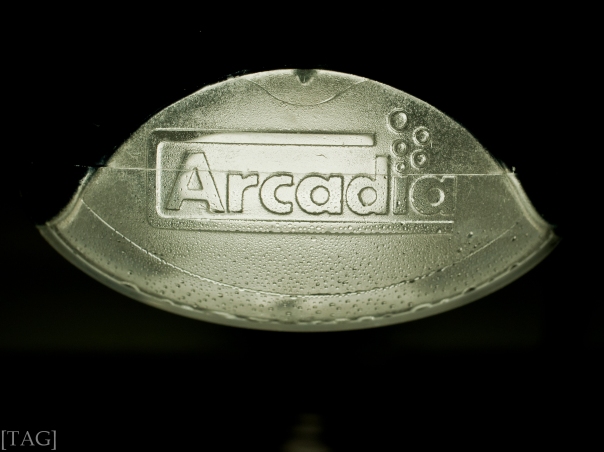
Arcadia Arc Pod (9w)

In Lighting on May 11, 2011 at 00:01

Arcadia, an aquarium lighting company from Britain, launched the Arc Pod more than 5 years ago. It comes with a high price tag when compared to other brands and they all use the same compact PL 9w bulb. So why do consumers still purchase the Arc Pod?

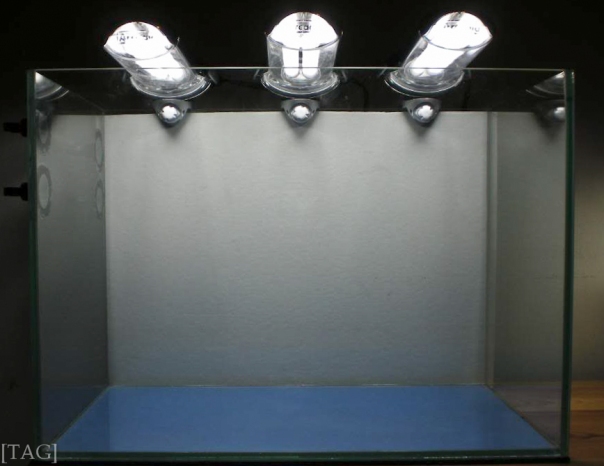
The appeal of the Arc Pod lies in its design and functionality. It’s design is sleek, simple and effective. Other brands will often have their light unit parallel to the length of your tank. In bigger tanks, this works great, but if you are in the market for a 9w unit, you will most likely be using a nano tank. The problem with using lighting units that are of a parallel orientation to a nano tank, is that it’s pretty conspicuous. The Arc Pod is designed to mount on your tank’s back wall and is perpendicular to the length of your tank, this gives it a much lower profile. When using open-topped rimless tanks, this low profile is very much welcomed. When growing light demanding plants, more units can easily be added without looking cluttered.

The 9w compact PL tube is encased within an other cover that is clear at the bottom, with a reflector on top. There has been concerns, that by using an other cover, light from the compact PL will not have the same penetrative power, when compared to other brands that do not spot an outer cover. This concern does hold water, but we tried it out, and found that we could grow the same plants as well as the other brands that do not spot an outer cover, with the same wattages. The outer cover is secured to the rest of the unit through twin plastic clasps, a rubber plug at its base gives credence to Arcadia’s claim of a water-proofed unit. The Arc Pod sits on a clamp that holds it to your tank’s wall. This clamp also enables you to swing the unit upwards during maintenance and is incorporated neatly into the design.

In spite of its superior design and functionality, a few issues do plague the Arc Pod and prevents it from attaining perfection. The sliver paint that is used for the top half of the unit and the clamp are prone to dropping off after a few months of use. If you like having your tank’s water at the brim, your clamp will sit inside the water and the paint will drop off rapidly. Because of this problem, we customised all our nano tanks to have a back wall that is 2cm higher, this allow the clamp to clear the water line.

The next issue also stems from the clamp. After a few months of use, the plastic screw thread that holds your clamp to the tank wall will become non-responsive, and it will be impossible to turn it smoothly. We had to remove our light units from the clamps if we wanted to shift positions as some force will be needed to get them loose. The third issue may not be that much of a problem but we would like to see an improvement if a revised version of the Arc Pod is considered. The power transformer units are big and heavy, if you are using several Arc Pods like us, this may be a problem because of space constraints in the aquarium cabinet or underneath a table. Speaking of several Arc Pods, these lighting units do not come cheap. At its current local prices, for a single unit you could easily get three units from other brands.

If you could live with the issues we highlighted or solve them through tank modifications, you will find the Arc Pod a conventional PL lighting unit that has a design perfect for nano tanks, unrivalled by any other lighting units out there. As for its cost, we think its worth it. Having used them for years now, we appreciate how open they allow our nano tanks to be, without comprising on lighting levels.

[TAG]

credit: Arcadia United Kingdom

jcardona1′s Wild Discus Biotope (3)

In Build on May 10, 2011 at 00:01

Welcome to Edition 3! If you have missed out on Edition 2, it can be found here: http://theaquaticgazette.com/2011/05/02/jcardona1%E2%80%B2s-wild-discus-biotope-2/ Enjoy this edition!

jcardona1: Decor for this tank is pretty simple, since I was going for a South American biotope look. I wanted a nice 3D background, but I didn’t want to lose several inches in depth. So I settled for the thin pieces that are tiled on. I ended up going with the Aqua Terra Slimline Mesa Rock background. For those of you that are familiar with backgrounds, you will know that Aqua Terra is really the best there is. When you see one in person, you’ll know why. To finish up the look, I have also covered the overflow box with the background tiles.

The substrate is a mixture of sand and gravel. Sand is 12# mesh Monterey Beach Sand. The gravel mixed in with the sand is ‘Klondike Brown’ gravel. Both the sand and gravel were purchased from a local rock yard.

Driftwood is Manzanita, collected locally in the northern California area. I placed the driftwood vertically in the tank to give it the look of tree roots growing into the water.

To make my life easier with the constant water changes needed, I decided to set up as semi-automatic water changing system. Since the tank was in my living room, it was a little difficult to set up a 24/7 drip system as I couldn’t take advantage of gravity to drain the excess water from the sump. To do so would have required a system with float switches, reservoirs, solenoids, etc. I didn’t want to deal with the extra cost, so I chose a super simple setup.

The main part of the system is the 55 gallon ageing barrel. The water is fed from my washer’s cold water supply line. It passes through a chlorine/chloramine filter, pressure regulator and then goes to the ageing barrel. The water level in the barrel is maintained automatically with a float valve. I chose to use a barrel to heat and age the water for degassing purposes.

The 55 gallon barrel is in a coat closet, and contains a small submersible pump to supply fresh water to the tank. There is another submersible pump in my sump; this is used to drain the tank for the daily water changes. The drain and refill pumps are controlled by a wireless remote control. To actually perform a water change, this is what I do:

– Turn off main pumps and heater, let extra water flow down to sump. – Turn on the drain pump in my sump via the remote control. This drains to a nearby bar sink. – Once the sump is empty, turn on the refill pump via the remote control. This supplies aged/heated water from the 55 gallon barrel. – Once the sump is full, turn on the system.

And that’s it! After that, the 55g barrel gets refilled with treated water from the float valve, ready for the next day’s water change. With this setup, I can change 30 / 35 gallons per day, depending on how much water I keep in the sump. And I can do it in a matter of minutes while sitting on the couch, thanks to the wireless remote!

cold water feed from washer hookup | feeds to ageing barrel (not shown)
drain pump that drains to nearby sink
drain pump
spigot that refills the sump from the aging barrel, with a Y-valve for adding water to other tanks

In a few months I plan on going to a fully-automatic system, whereby the drain pump comes on at set intervals throughout the day using a timer, draining only a few gallons at a time. The sump will then be refilled using an automatic top-off controller, commonly used in reef tanks. I spent too much on this tank already, so I saved some money by not buying the top-off controller right now. I will soon though.

Well, this has been a long write-up. I think that covers most of it. On to the full tank shots!

In Edition 4, jcardona1 updates us on changes to his completed tank. To read about more wild discus, an RO/DI system, and a modification to his LED controls, click on this link: http://theaquaticgazette.com/2011/05/15/jcardona1%E2%80%B2s-wild-discus-biotope-4/

[TAG]

credit: jcardona1

Filipe Oliveira’s One Step Closer

In Film on May 9, 2011 at 00:01

Filipe Oliveira of FAAO Aquascaping is an internationally recognised aquascaper and ELOS ambassador. His latest aquascape, One Step Closer, has been documented into films on YouTube. We have embedded them here for your convenience. Please click on this article’s title to view the films in their proper sizes.

[TAG]

credit: FaaoStudio | faao.blogspot.com


Frank Wazeter’s “Francis Xavier” Single Stone Iwagumi & ADA Philosophy Guide (3)

In Build on May 8, 2011 at 00:01

Welcome to Edition 3! If you have missed out on Edition 2, it can be found here: http://theaquaticgazette.com/2011/04/30/frank-wazeter%E2%80%99s-%E2%80%9Cfrancis-xavier%E2%80%9D-single-stone-iwagumi-ada-philosophy-guide-2/ Enjoy this final edition!

Frank Xavier: So we’re exactly at the one week mark and here’s how she looks.

As you can see, there’s a huge amount of difference! But really, there’s a mystery plant of sorts growing in the riccia, which I have no idea what it is, originally I thought it was a stray piece of HC that got stuck, but as it grew up just a little bit, it became apparent that that’s not what it was.

It doesn’t surprise me there’d be a random plant stuck in there – considering the Riccia comes from the San Marcos river. However, I hope it’s not H. Polysperma, which would be a very likely candidate given the source.

Normally I would start dosing Green Brightly Step 1 and go with water changes every other day, but for this one, I think i’ll stick to just Brighty K and a daily water change, 1/3 of the water instead of nearly 100%. Once more of the plant mass gets to submerged growth, I’ll start adding some Step 1. I think if I were to start adding it now, I would begin to get some unwanted algae.

For contrast, here is another layout in my Mini M I’ve been working on that is also one week old:

I’ve been using the same method here, and I can start to see signs of an iron deficiency, but again, I’m not going to start dosing ECA until the stems get a little bit more established. There’s a random Bucephelandra in there, temporarily weighed down.

That style is a more new-ish type of style I’m working on, relying more on stem plant arrangement and the placement of smaller stones to come together with a moss carpet – inspired by other types of Japanese gardens.

A week and 5 days later, I have now started on an every-other day dosing scheme for both tanks. I am still only dosing Brighty K, and no longer dosing Green Bacter, except for one-two drops after a water change. The Riccia is starting to bounce back and bounce up! the makings of the carpet is coming around now. Maybe I won’t have to retie the riccia stones after all. The hydrocotyle in the back is, to no surprise, growing like a weed.

In the Mini M, it was time to give the first trim – which occurs as the stems start to reach the top of the tank. I ended up fairly mercilessly triming them down to the bottom and then replanting a few tops here and there. Trimming them down like that encourges them to sort of “split” or grow out side shoots that go up as well, which is how you inevitably, through proper trimming, get a full ‘bush’ look with stem plants.

You’ll also notice I rearranged a few things, I found a slightly more elegant positioning for some of the plants.

right after trim
one day later

Dosing on the Mini M is up now to Brighty K + Green Brighty Step 1. Green Bacter 1-2 drops after water changes.

The slight ‘yellowing’ you see in the day two pictures is the natural effects of Amazonia I / old type – this is usually what’s referred to when ADA mentions “cloudy” water. This currently occurs because I’m not running any carbon on any of the aquariums, which would remove this effect fairly easily. It is actually recommended by ADA to use carbon for the first three months of the Aquarium and then replace with biological filtration, but I’m just too lazy to add carbon right now. Which ironically leads to having to do more water changes anyway. For me it serves as a good reminder to change the water during the first two weeks.

At the start of the third week – and ironically, as so often happens with planted aquariums, the ones giving me hassles have completely flip-flopped. So i’ll start with the one that’s not arguing with me at the moment, the Mini S:

That riccia is coming in nicely now – and I think it may be my favorite plant at the moment for a carpet. I’m highly tempted to incorporate it into the Mini M in lieu of Moss. But not goign to go in on that one quite yet. The hydrocotyle is also forming up nicely in the back (as if it ever needed much encouragement, truly may be the easiest plant to grow ever). The end goal of the hydrocotyle is for it to kind of drape over the top left side of the stone and form a background of sorts in a similar way to the way hair grass is used. This is possible because hydrocotyle kind of “floats,” as it grows, hovering over the substrate / objects as opposed to densely covering them.

The main stone seems to be having a little bit of diatom/brown algae and cyano growing on it, on one of these water changes next I’ll end up hitting some maracyn into the system to remove the cyano, and if the brown algae remains a problem, i’ll dab the stone itself with h202 (hydrogen peroxide) by essentially diluting some h202 with water and dipping a small brush into the mixture and dabbing it over the rock while the aquarium is drained. This is also a good technique for removing BBA off of driftwood and stones.

Currently the dosing regime is Brighty K x 1ml and Green Brighty Special Lights x 1ml (every other day).

Also had the first cleaning of the lily pipes last night, I’ve found that if you’re proactive with cleaning them out every two-three weeks then they are easier to keep clean and the clear tubing stays pristine / perfect much, much longer.

When it comes time to trim the riccia, I believe I’ll replant some HC more in the front and re-tie the riccia to stones, the reason being is that since the riccia melted the way it did, it may be unnecessarily prolonging the carpet not flourishing completely and evenly, and this could speed things up. Also using a few smaller stones to tie riccia to in the front could increase the visual appeal with the way riccia grows up – but so far, so good!

Now, onto the Mini M, this is after a full water change:

There isn’t much for algae problems in this setup, however the stems went into an extreme deficiency pretty quickly – and admittedly it was in part due to my hesitance to increase dosing regimes and in part because co2 wasn’t being distributed enough evenly.

I had to replace the MP-1 Do!Aqua lily pipe with a P-1 ADA lily pipe, since the MP-1 just wasn’t putting the flow in the appropriate spot for this aquarium and it was causing some starvation since nutrients as well as co2 weren’t being properly pushed through the stem plant mass. The ADA P-1 is definitely vastly superior to it’s Do!Aqua equivalent, and I’m kind of annoyed I didn’t decide to go with this option first.

The stems never really bounced back from the first trimming, but after doing the water change I replaced the lily pipe, dialed up the Co2 and dosed Brighty K x 3ml, Green Brighty Special Lights x 2ml – tomorrow will be Green Brighty Step 1 x 2ml and it’ll be an alternation day by day. I should note that within 3 hours or so of the co2 distributing properly and dosing, the stems appeared much healthier in the way they were standing back up, and hopefully they’ll bounce back pretty quickly.

I’m also choosing to not talk about the moss carpet yet. I’m going to wait a little while before coming to an official opinion on that.

This is the last edition of Francis Xavier’s build. If you would like to continue following his progress, kindly click on this link: http://www.plantedtank.net/forums/planted-nano-tanks/132587-single-stone-iwagumi-ada-philosophy-guide-2.html

Thank you for reading and we look forward to showcasing any of his future works.

[TAG]

credit: Frank Wazeter “Francis Xavier”

credit: http://www.aquariumdesigngroup.com

Bangkok LFS Trip

In Local Fish Shop on May 7, 2011 at 00:01

We had the wonderful opportunity to visit some local fish shops in Bangkok over the Labour Day weekend. The first shop we visited was aquamarts, a well-known shop dedicated to planted tanks and high quality shrimps. The second, third and fourth shops were just common LFS that were found outside aquamarts, we could not get the names of these shops as they were in Thai. The fourth shop we visited was a real surprise though, good quality plants and lots of stuff dedicated to the planted tank hobby. The area we visited is right beside Chatuchak weekend market, behind JJ Mall.

Here are the slew of pictures we promised. Enjoy!

aquamarts

Second LFS

Third LFS

Fourth LFS

[TAG]

EvolutionZ’s 432 litres Aquascape

In Build on May 6, 2011 at 08:48

EvolutionZ is an aquascaper who frequents forums such as Arofanatics and Aquatic Quotient. We came across his beautiful, well-maintained 4 feet aquascape and took the opportunity to ask some questions. 

[TAG]: We would like to thank you for fielding this questions. Most aquascapes start with an inspiration, what was yours?
EvoZ: Actually I didn’t had any inspiration. I just went out to search for wood that fits my liking and tank size. I randomly place the woods to what I think looks best.

[TAG]: Takashi Amano, in his recent lecture, reviewed that he does not think too much when he scapes. It looks like you are doing the same, is this kind of natural expression better for aquascapers?
EvoZ: I won’t dare to say that I think the same way as master Amano, but I do agree that I personally, do not think too much of a scape as well. I just have to make sure the position of the wood is aesthetically pleasing.

[TAG]: What do you think are the most important aspects of maintaining a healthy aquascape like yours?
EvoZ: Keeping up the maintenance by doing weekly water change, daily fert dosing and regular trimming.

[TAG]: Could you share with us how much water do you change weekly, what is your daily fert dosing amounts?
EvoZ: I do 50% water change once a week. i dose Lushgro Aqua + kH2po4 for macro, lushgro Micros + seachem iron for micro and i dose them using EI method on a daily basis.

[TAG]: What filter are you using and why?
EvoZ: Im using the Fluval Fx5 + 3000l/hr SunSun wave maker.. Personally i believe in high and strong flow in a planted tank is very important.

[TAG]: What advantages have noticed by maintaining such a high rate of flow?
EvoZ: One noticable advantage will be decreased in dead spots.

[TAG]: Why is the decreased in the numbers of dead spots important?
EvoZ: Dead spots encourages algae to grow,  especially blue green algae.

[TAG]: How do you keep your aquascape algae free?
EvoZ: Right now the only algae im seeing in my tank is green spotted algae on the tank wall.. i manage to keep other algae away by slightly over dosing Co2 level in the tank. I keep ferts and lighting on the high side as well.

[TAG]: By slightly over dosing, what ppm or bubble per second are we looking at?
EvoZ: i am currently having 5 – 6 bps via a glass diffuser which makes my drop checker shows yellow.

[TAG]: Speaking of lighting, what is your photo-period and the intensity of your lights?
EvoZ: 4x54watt T5HO (7000k) for 10 hours daily.

[TAG]: What do you think about the future of our hobby?
EvoZ: I believe the trend for planted aquarium has always been there, be it locally or overseas. I do hope more shops dedicated to planted tank like Colorful and Nature Aquarium will start surfacing.

[TAG]: What are your plans for your next project?
EvoZ: I will be turning this scape to a low-tech tank. Most plants will be changed to low-tech plants, no plans to change the scape yet.

[TAG]: We look forward to featuring your rescape and thank you for taking our questions.

credit: EvolutionZ

Eheim Liberty 100/2040

In Filtration on May 5, 2011 at 10:37

The Eheim Liberty is the hang-on filter series for this reputable filter company. In nano tanks when the need of filtration media quantity is not that great, these filters are popular as they are simple to set-up, they provide an ease to maintenance, they are cheaper compared to cannister filters and they are less of an eyesore compared to internal filters.

Eheim Liberty 100/2040

Technical Specifications
Model: 100 / 2040 (depending on your region)
Approx Max Aquarium Size: 75 litres
Approx Pump Output: 150 to 380 litres per hour
Power Consumption: 2.5 Watts
Available Filtration Volume: 600ml
Approx Filter Volume: 240 litres
Dimensions: 180mm x 105mm x 135mm

The Liberty 100/2040 is the smallest hang-on filter in the series. Build quality is solid and excellent, one of the best constructed hang-on filter in the market. Every part of the filter speaks of quality, and you do feel a sense of pride when assembling it. The red flow switch is large and has nice resistance to it, which makes for a precise control of your filter’s flow rate. The cover of the media compartment doubles up as water catchment when removing your filter media for cleaning. Filter media cartridges are similarly well constructed and their black handles makes insertion and removal a painless affair. Everything feels snug and tight in this filter, there are no loose bits or poorly machined parts.

How great a filter performs is dependent on two fundamentals;
1. How the flow of water has been designed
2. How well the filter media performs

With cannister filters, it is common to use your own preferred media, you are not restricted to the cannister company’s media. For hang-on filters, it is another story altogether. Hang-on filters are much smaller than cannister filters and their media are specially made to fit their interiors. Using company’s A media for company’s B hang-on filter is not always going to work. Even if you could fit it in, it is not going to fit tightly and you do not want any flow bypassing your media through the cracks. Modifications are possible and can be found on the numerous aquatic forums, but it is not going to be everyone’s cup of tea.

Eheim Liberty 100/2040 comes default with a blue sponge cartridge that is meant for general filtration, in other words, it is a mechanical and biological filter sponge. Again, the quality of the Liberty series translates to a filter sponge that is very well made, we can easily foresee a decade of use without any problems. Performance wise though, it is slightly disappointing. The blue sponge cartridge reminds us of Eheim’s blue filter pads from their cannister filter range. These blue filter pads are meant for mechanical filtration, trapping the bigger amounts of dirt so as to prevent your biological media from getting bogged down. It may be because of their similarity that the blue sponge cartridge works exceedingly well as a mechanical media, but in doing so, it prevents effective water flow throughout the blue filter sponge as the front wall clogs up quickly because of the small surface footprint. If the blue sponge cartridge is not cleaned on a weekly basis, quite a bit of water flow will bypass the sponge and flow over it instead.

blue sponge cartridge

However, the biggest issue we have with the blue sponge cartridge, is its inability to polish the aquarium water as it leaves the filter. Most competing brands will incorporate a fine filter wool media in their filter and this filter wool will trap minute dirt. Because the blue filter sponge is not fine enough to trap these minute dirt, you will see them flowing around your aquarium.

blue sponge cartridge | close up

Instead of using the blue filter sponge, there is the choice of purchasing the green sponge cartridge together with the carbon cartridge. The green sponge cartridge is touted to be a superior, biological friendly media and the carbon sponge is your usual chemical filtration media.

The green sponge cartridge has a smaller cross section than the blue sponge cartridge, as such, more surface area should be available for beneficial bacteria cultivation. We can see the smaller cross section as being the reason why the green sponge cartridge will be more effective for biological filtration. But in overall sponge size, it is only about a third as thick, as the blue sponge cartridge. So unless the green sponge cartridge’s biological effectiveness is more than 3 times that of the blue sponge cartridge, the superior biological claim is not really true. We wish Eheim will release more technical and research data on all their filtration products, like Seachem does. This will enable us to make filtration decisions based on hard facts.

green sponge cartridge | close up

blue & green sponge | size comparison

The major difference the green sponge cartridge has, is in water flow. The blue sponge is designed to have all flow passing through it while the green sponge is designed to have some flow pass over it. The reason for such a design is that water that comes into contact with the green sponge and then pass over it has more contact time with the biological bacteria than if passing through it. To achieve this, the green sponge is lower in height when compared to the blue sponge, encouraging water to pass above it instead of going through it, as there is less flow resistance in doing so. How much of an advantage is this, we will never really know unless an extensive test is done in a controlled environment.

green filter sponge | carbon sponge

When using the green sponge cartridge, an activated carbon cartridge is also to be used, using a carbon cartridge brings chemical filtration to the fore. Chemical filtration through the use of activated carbon is a proven and effective method. The activated carbon absorbs organic pollutants, harmful ammonia and excess nutrients. We would like to highlight that organic pollutants such as organic acids, metabolic waste, hormones, proteins, organic compounds and antibiotic compounds cannot be removed by mechanical or biological filtration.  ADA has been known to use 100% activated carbon filtration for their Mini S & Mini M. For aquariums that do not use chemical filtration, all is not lost, just keep up with regular water changes to aid the removal of organic pollutants.

After a period of time, activated carbon would lose its absorption properties as it runs out of space to bind more pollutants to itself. Contrary to popular belief, these pollutants will not leak back into the water column when the activated carbon is spent. Most aquarium companies would recommend a changing of activated carbon on a monthly basis.

The activated carbon cartridge also performs a vital task in which the other cartridges have failed, it polishes the aquarium water, due to its compact and dense form, trapping minute dirt. On a weekly basis, we give the activated carbon cartridge a swirl in aquarium water to wash these dirt off the sponge surface, this is essential in keeping the activated carbon’s surface optimal for absorption. You will find water bypassing the activated carbon because of accumulated dirt if not for the periodic clean.

carbon cartridge | close up

For the Eheim Liberty 100/2040, one can argue that the combination of green sponge cartridge and carbon cartridge is the most effective because there are mechanical, biological and chemical filtration properties. Our preferred set up would actually be the blue sponge cartridge with a activated sponge cartridge. However, this is not possible due to the lack of space. But with the bigger Liberty models, it would be possible as their filter compartments are bigger.

Although it is rated for an aquarium up to 75 litres, we find that it is just about keeping up with our 15 litre tank. Weekly maintenance for the green sponge cartridge / activate carbon cartridge or fortnightly maintenance of the blue sponge cartridge is a must.  Another issue we faced, was a noisy impeller after some sand got sucked into the intake tube. So if you plan to use fine sand in your aquarium, we would suggest skipping this filter.

blue sponge cartridge | carbon cartridge | green sponge cartridge

If you have space of a cannister filter, we would recommend the Eheim Classic 2211 over the Liberty 100/2040. The Classic 2211 has about the same amount of flow as the Liberty 100/2040 but 4.16x the amount of filtration space. The design of a cannister filter will also make for more effective and efficient filtration. If you have to use a hang-on filter, the Liberty series is among the best. If Eheim does a rethink and redesign of their Liberty filtration media to match the effectiveness of the cannister filter media, they will secure the crown of hang-on filters comfortably.

[TAG]

credit: Eheim Asia Pacific

jcardona1′s Wild Discus Biotope (2)

In Build on May 2, 2011 at 21:26

Welcome to Edition 2! If you have missed out on Edition 1, it can be found here: http://theaquaticgazette.com/2011/04/28/jcardona1s-wild-discus-biotope-1/ Enjoy this edition!

jcardona1: Lighting is one that deserves it’s very own section, since I went into total crackhead mode here Click the image to open in full size. I did a lot of think and a lot of research before finally pulling the trigger. I know for certain that I did not want to run fluorescent lighting. I was tired of the “flat” look it gives the tank. It’s very unnatural, and I don’t like how every square inch of the tank is lit up evenly. I also knew I wanted the shimmer effect, so it was either metal halides or LED. Metal halides were completely out of the question, since I don’t like the idea of making the electric company rich! So, LEDs it was! I was almost set on running 4-6x 10w LED floodlamps you see more and more folks using these days. In the end, I decided to go DIY to give me more flexibility. These floodlamps are made in China, so you can’t really know how long they’ll last, or whether you’ll be able to buy replacements in the future. But the main reason for going DIY was color choice. ‘Cool white’ LEDs are ugly in my opinion. They wash out the color of fish too much. The warm whites are very yellow. If I chose the floodlamps, I wouldn’t be able to mix up the colors to get a nice mixture.

The light bar itself I made out of 1” metal conduit, which I bent into shape using a manual pipe bender. The light fixture is a big and heavy piece of aluminum heatsink, measuring 7×36”. I also attached a splash shield made from ¼” acrylic. The shield really isn’t needed, but it finishes off the fixture nicely, makes it look more legit.

The LEDs are Cree XP-Gs. They cost a little more than other brands, but the quality and reputation is well worth the extra cost. The fixture uses 12 neutral white LEDs (4000k) and 12 warm white LEDs (3000k). They are arranged in two rows of 12, alternating each color in the two rows. LEDs were soldered up using 20ga solid core wire, wired in series and in 4 strings of 6 LEDs each.

warm white Cree XP-G
neutral whites and warm whites

The brains behind the operation is what really makes this light special! My initial plan was to drive the LEDs using pre-wired Buckpucks with a dimmer switch. But after talking to my good buddy Aaron (member: o2surplus on monsterfishkeepers), he convinced me to go with a custom driver and a microcontroller. The driver was built entirely by Aaron, so I take no credit here. In fact, if it weren’t for him constantly answering my noob questions, I probably wouldn’t have been able to go the DIY route. If you’re interested in a driver setup like mine, shoot him a pm, he may be able to build one for you Click the image to open in full size.

The LEDs are driven by four ON Semiconductor CAT4101 constant-current drivers. Each CAT4101 is controlling a string of 6 LEDs. 4 drivers running 6 LEDs, total of 24 of LEDs. Each driver controls an individual color; drivers 1 and 3 control the warm whites, drivers 2 and 4 control the neutral whites. The current to the LEDs is controlled by soldering an external resistor to one of the CAT4101’s pins. In this case, a 549ohm resistor was used for each CAT4101 to drive the LEDs at 1000mA, or 1a. The XP-Gs can handle up to 1500mA, so this is well within their safe operating range. For those who want to understand more on the CAT4101, you can find the technical specs here: http://www.onsemi.com/pub_link/Collateral/CAT4101-D.PDF

For dimming and on/off control, the CAT4101 relies on an external pulse width modulation signal (PWM). That is where the Arduino Duemilanove microcontroller comes in. To keep the microcontroller in sync with the on/off cycles, and in case the power is disconnected, the Arduino is connected to a DS1307 Real Time Clock with battery backup. The code I uploaded to the Arduino is set up to run sunrise-to-sunset lighting. The lights slowly fade on in the morning, and slowly fade out at night. Each LED string is fully adjustable for start time, photoperiod length, and brightness. This allows me to dim or brighten up the warm and neutral whites to get the color mixture I like. All I need to do is hook up the Arduino to my laptop and quickly edit the code. How freaking cool is that?!?!?

Custom PCB: screw terminals on top row are connections for the 4 LED channels. Middle row you’ll see the four CAT4101 drivers. Bottom left terminal is 24v power supply connections. Bottom middle terminal is 12v power supply for microcontroller and ground connections. Bottom right terminal is for the PWM signals from microcontroller, and for manual override.
24v power hookup and override switch
Arduino Duemilanove microcontroller (on inside lid of project box)
Arduino with real time clock module
Driver PCB and Arduino connected

This ‘magic black box’ that Aaron built me is really a work of art. The board is so neat and tidy. All the terminals and connections on the board are labeled. Everything is taken care of; the 24v power source hookup, the 5v power to run the CAT4101s, 12v power for the Arduino and fan connections, and the pins for the 5v PWM signal to the Arduino. He even included a power indicator light and an override switch to turn the LEDs on at any time, bypassing the Arduino. Only thing I needed to do was purchase the microcontroller and Real Time Clock and hook those up. So easy, a caveman can do it!

The project box, showing USB connection for microcontroller and LED hooksups
Other side of project box: 24v power hookup, LED indicator light and override switch

And last but not least, the power supply. Everything is powered by a 24v, 6.5a, 150w power supply.

24v 6.5a power supply

Thanks for reading Edition 2. In Edition 3, jcardona1 will be sharing his decor, water changing system and full tank shots, to continue on, click on this link: http://theaquaticgazette.com/2011/05/10/jcardona1%E2%80%B2s-wild-discus-biotope-3/

[TAG]

credit: jcardona1